| FEELGOOD, Chris Wade's 1965 Sport Fisherman ( A Photographic Review )September 29 2008 at 9:56 PM | 
Paul (Premier Login FEfinaticP)
Forum Owner |
| The images that follow speak for themselves, as there has been many thousands of dollars of hard work and cash put into this boat to make it look as it does today.
The very pampered 38
Every now and then I run into a pampered 38 Commander that makes my old battlewagon look like it had the life of a street fighter. My Commander came from an open marina on the Ohio River, and Im not real sure about its life before it arrived there. In any case, it had scrapes and worn teak, and lots of cosmetics and some mechanical issues to tend to, but it was basically a solid boat. We love her today, having had her in the family now for well over a decade, she is part of our psyche now. Thinking back on all the work weve done makes me wonder whether I like boating or whether I like working on boats more than I like driving them. The truth of the matter is, I like it all. If it is even standing in the parking lot at the marina, I like it.
Now here is a pampered Commander that has apparently lived the lavish life of being put up each winter, being stored indoors, having thousands of dollars worth of raw teak alone, added to her hull, not to mention the cost of the labor to put that teak aboard and make it look that good. This is Chris Wades FEELGOOD, and it is a 38 Sport Fisherman that has been converted back to Sedan status, by raising the lowered aft deck (which is now all brightly finished teak).
The 38 Sport Fisherman was Chris Crafts first real run at the fiberglass SF market, and they used the 38 Express hull, with a lowered aft deck to put people closer to the water. The SF has no aft rail either, because the lower deck not only puts a person closer to the water, it has a way of making the toe rail high enough to serve as a railing to keep people in the boat. The absence of the aft railing found on all 38 Express and Sedan models just makes it that much easier to land a large fish, and that is what the SF model was intended for. Many of the SF models have found themselves being used as luxury cruising yachts, and this one is no exception. It is living the life of a Sedan now, but it looks soooo much better than the average sedan. The interior is spectacular, the new nose rail is nothing short of amazing, and the aft deck (all teak) is bright enough to shave in. Chris is a wood worker by trade, being a small business owner, he has used his extensive skills to transform FEELGOOD into something of a higher level.
All of our boats have a history of good times, not so good times, and many of those times are lost along with the previous owners. Many of the memories still exist, thanks to photographic images, and we are pleased to have some of the FEELGOOD history here in this photo expose to share with our readership.
Here is just a scratch in the surface, in the life of FEELGOOD. As you can see from the following images, its been quite a bit of tender loving care, lots of cash, and a lot of hard work that FEELGOOD has received. This is one pampered girl!


The saga continues..........................more photos.......lots more!
This message has been edited by FEfinaticP on Dec 30, 2008 8:55 AM
This message has been edited by FEfinaticP on Oct 1, 2008 5:01 AM
|
|
| | Author | Reply | Paul
(no login) | More on the Pampered Commander ! ( A little history on the boat ) | September 29 2008, 10:00 PM |
| Paul
(no login) | Removing hardware, getting ready to replace teak toe rails | September 29 2008, 10:04 PM |
| Paul
(no login) | Removal continues, including bow pulpit ( Prep for new teak toe rails ) | September 29 2008, 10:07 PM |
These rotten @#$%^^^ cleat screws are bronze and about 6 inches long. They thread into steel. they were gaulded and rusted so severly that some were just never going to back out. I had to cut them off. I am assuming I will be able to relocate slightly and drill and tap new holes.

Bow pulpit removed. My windlass needs some machine work done so it had to come off. It was through bolted to the pulpit with no access to the nuts. At that point we had to remove the pupit!

With the pulpit off, a visual was available of a cross section of the toe rail and deck to hull joint. I found this very interesting and had never seen it posted any were before.


After digging out all the plugs covering the screws we found that even using the correct phearson screw driver tip did not keep us from stripping out the screw heads. ( We learned a little later that most of the screws were put in at about a 10 degree angle towards the middle of the board ). Many were also snappimg off. A decision was made to use a 1/2 inch plug cutter and cut around all the screws down to the fiberglass.

After all the relief holes were drilled the plug cutter sure didn't owe us anything. I used a mill file and hammer to keep it somewhat sharp and true. I would stock up on 3 or 4 next time.

The first piece of toe rail comes OFF !!!!

My son Tyler Wade removes another piece of teak.

With the boards pulled off there was no stress on the screws. We were then able to back out the majority of the screws with no trouble. The ones that gave us a fight were cut off flush with a dremel and cutoff wheel

A Fein Multi Master was used to cut the outer cap molding at the board joints. This is an absolute must have in anyones tool arsenal.

Things are moving along nicely at this point!

Here are all the pieces of toe rail ready to take back to my shop for templating and fabrication.

|
| Paul
(no login) | Work extends to the flybridge ! | September 29 2008, 10:10 PM |
1965 FFA under another round of restoration
PS Here is a very important tool for a job of this magnitude


1) I have yet to purchase the lumber for the toerails allthough I have done a good bit of leg work. There is a lumber yard in Vikory, Ohio that I have bought from before and will probably use again so that I can hand pick the stock.
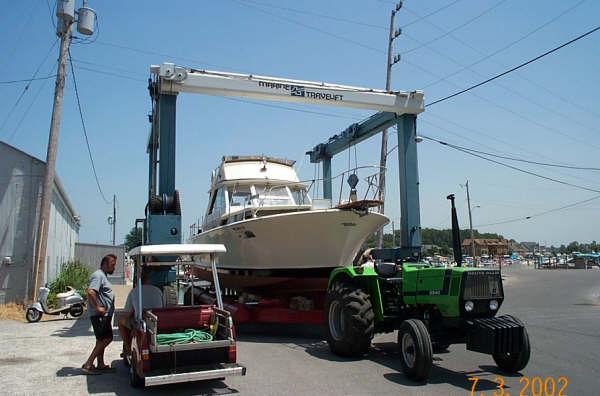
2) Elvis was busy checking the bottom for blisters of which he found none of course


" The Man Room " The owners of Gem Beach Marina are good friends and kind enough to allow me to work on my boats in this huge paint booth when no jobs are scheduled for it. Usually I get a month in the fall and late spring to hit it hard.

22" X 22" 3 blade wheels

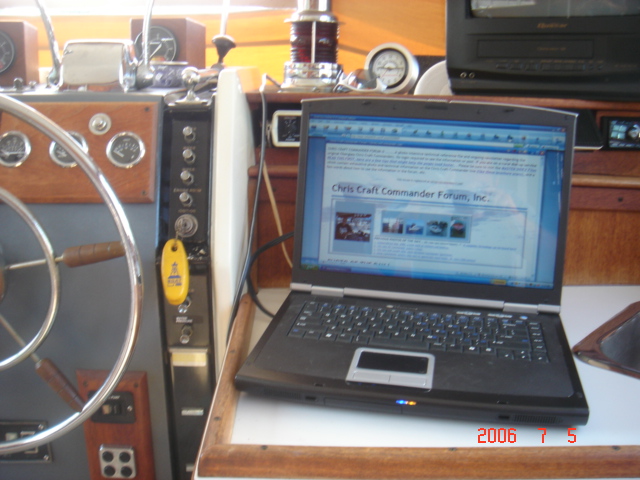
Fuel Efficiency Gauges - Wouldn't that be an oxymoron when applied to boating ?


My worst nightmare!!!!!!!! I consider myself to be pretty good with my hands but, this mess will require alot of a quality I sometimes lack, PATIENCE !

Along with the rewire we will retrim and detain the fly bridge and install new decking

Of corse there is the obligitory sanding and refresher coats of varnish on the existing brightwork
|
| Paul
(no login) | Using old pieces as a pattern for the new ones ( Think this is easy, then think again! ) | September 29 2008, 10:14 PM |

After we unloaded and set up it was time to sort the stock and layout the pieces according to size shape and end to end match.

We looked at the teak in different light and from different angles until we had the best matches from which we had to choose.

The only thing wrong with this picture is the lack of one teak board to match to the last piece, whoopsie. 
(Remember when I mention how lucky we are to have a lumber yard in close proximity to the marina).

This is a "Professional", 12" table top surface planer. I found out the hard way that it is no match to the density and oil properties of Teak. If I had it to do over again, I would pay the piper, eeeer, the planer at the lumber yard to do this aspect of the milling. I may have rejected a couple of boards if I had seen them surface planed. OH WELL 

After the losing the battle with the planer, my 36" dual drum finish sander stepped up to the challenge. I use this tool in my cabinet shop to surface sand raised panel doors after assembly. It was a bit of a chore to run all these boards down to 1" by sanding but the goal was achieved.

With the boards selected we transferred the inside lines of the old boards to the new. There is a trim piece around the outside edge to make up for the deck to hull overlap joint. We choose not to take apart the assembly of the toe rail and trim when we removed them from the boat. The outside line would be marked later.

Cindy demonstrates the jig saw cutting technique while leaving the lines.

This was a very important aspect of the job. I didn't shot any other photos because it took 2 hands to handle this whopper! All though it is only a 3 X 21 belt sander it is pretty weighty and combined with the pulling tork when pressed against the edge of a board, it takes a bit of muscle to handle. All the radius's were hand fared (to the lines) with this machine. After the inside curves were fare and true a combination square was set to the appropriate width and used to mark the outside edge for cutting with the jig saw and fared in the same way. (Then I followed the sanding by routing an 11 degree bevel to the inside edges. more on that later).

The next step was to lay out all the fared pieces on the boat.

Close attention was payed as to how the grain would move from board to board.

The main purpose of this step is to mark the inside and outside tangents where the boards overlap one another. They were then removed, the marks connected across the boards and cut in a power miter box at a 15 degree bevel. This was done one by one with the angles adjusted until a water tight fitment was achieved at the butt joints. The last pieces were the tricky ones with a joint to fit at each end.

All pieces were temporarily screwed in place so we could inspect all joinery and lines and do any further fitting and faring to improve the look to the eye.
|
| Paul
(no login) | Fitting, fairing, and putting the puzzle together | September 29 2008, 10:18 PM |

The boards were marked, cut, sanded and fit. Now it was time to gear up for mounting. 1.5 zillion bungs were cut into teak left overs. I used a 3'8" plug cutter from Fuller, set up in mt drill press. (We used 2 small coffee cans full of bungs).

I call this one Jethro Bodine and Ellie Mae Clampit drilling what were just boards that are now toe rails for a Commander! They are using a counter sinking drill bit also made by Fuller. There are two rows of screws 5" on center. That is 3 holes per foot. Do the math, that's a bunch.

The bottom side of the rails were treated with a bead of bedding compound. The generous bead was paid over the pre drilled and counter sunk screw holes.

After bedding the rails were screwed back down to the boat in the holes we used for the dry fit. This realigned the miters and we predrilled thru our counter sunk holes into the fiberglass. It is important to note that the inside row had a wood member under the deck but, the outer row of screws was lightly torqued to only fiberglass. As per original factory construction, #10 1 1/4" brass screws were used to fasten down the toe rails.

In the last post, I neglected to mention how the inside bevel was achieved. I am sorry, but I don't have a picture of the operation. I will give you a description that should be easy to follow. I went to my local tool supply (they specialize in carpentry and cabinetry tools) and purchased an 11% flush trimming bit). With the bit installed in my Porter Cable 1/2 inch router, I screwed the base to the bottom of my work table. Thus creating a huge router table. After the inside curves were fared, I simply ran the piece against the bearing on the bottom of the bit and routed the bevel.

The boys of the Saturday Crew. From Left to right:
Chris "THE JOZ" Jozwiack. After brief career as a college student, I conned him in to trying a career as a plug cutter. He insists on teaching high school history in the fall though.
Tyler(son), and Zach(son-in-law) trying to figure out whether you are supposed to push or pull stock thru a table saw. They will be moved up to hamming a nail in the next semester.
JUST KIDDING:)ALL THEY GUYS WERE A BIG HELP THAT DAY AND i COULDN'T HAVE DONE IT WITH OUT THEM!
What Ty and Zach are doing is beveling the trim pieces that will wrap the out side curves.

The next weekend, it was time to finish and mount the trim. I had the tight radius pieces around transom corners to cut. I laid 'em out and went to get out the big ol' Bosch jig saw. Bumbed out after realizing I had forgotten to bring it, I headed to the Depot to by another one. On the way to the counter I saw a Dad's day display with this little bugger on it. $159 for the Bosch or 10 bucks for the workhorse with money left for more new chrome? Not the best tool for the job but, the chrome stern light will be stunning:)

I traced the out side edge of the rail and transferred it out an inch. Then cut the lines with the mighty workhorse.

After a bit of belt sanding and dry fitting, a sweet curvy trim piece was born.

This pic shows three important things. The first is the space that is left under the toe rail due to the deck overlapping the hull. This is part of the need for the trim. The other reason is to cover the end grain exposed when the curves are cut out of the board stock. The second is the pre-drilled screw holes measured to hit the center of the toe rails. The third thing to notice is the West System Epoxy Glue paid to the trim to toe rail joint. A liberal amount was used to hold this tight so that it will appear to be one piece.

The Forward most piece of trim was bent with a bit of coaxing and NO STEAM! I had the epoxy spread and a couple of clamps and my #1 first mate to help bend her into place a little at a time. I pulled it up tight with screws as we went.

This was probably the trickiest piece to fit of the entire job!

It goes here and had the quadruple compound cut on one end and a simple (ha ha) compound mitre on the other!

And finally the last piece of the giant teak puzzle.
|
| Paul
(no login) | Sanding and getting ready for the final finish | September 29 2008, 10:21 PM |
With all the new teak cut, fit, bedded, screwed and plugged it is time to sand and route the corners on the top edge off.

after the bungs were trimmed off with a chisel I used my trusty 3 x 21 P.C. belt sander to take everything down flush.

The plugs over the horizontal screws fastening the trim piece toe the rail had to be hand sanded with
80 grit stik-it paper on a wood block. Cindy decided to model a pose for a new teak figure head.

This pic shows the 15 degree bevel joint, plugs and trim all fared in.
Next up......I'm smellin' the varnish allready

Ready for battle armed with belt sander and random orbit sander.(AND DUST MASK)!!!!

About this time someone on the crew asked why in the hell I made them wash the entire boat down before we started all the work, HAHA!
This should be where the picture of the edge routing is inserted. It must have been late in the day because I completely missed that photo opp. Anyway I used a 3/4 rounding over bit in the little laminate trimmer I use for light work. I set the depth a different heights for the inside and out side. And then sanded them in to create to different radiusussus, (radii)? whatever.

Hey, did Pletcher sneak in the shop?

This was the final phase of the sanding. I use an old stik-it pad off the P.C. random orbit sander as a sanding block. In a nut shell the sanding went like this:
1) BELT SANDED W/ THE GRAIN 30 AND THEN 50 GRIT
2) RANDOM ORBIT 80 THEN 180 GRIT
3) BLOCK SANDED WITH THE GRAIN!!!!!! 180 GRIT
You can see the finished profile of the edges in this photo.
|
| Paul
(no login) | Finally seeing daylight again ( at the world's biggest Commander Rendezvous ) | September 29 2008, 10:37 PM |


FEELGOOD in mighty impressive company (and we're not just talking about the boats), and looking good.


After all the work outlined in the previous threads, and I do say "outlined" because there are a lot more photos and text to illustrte the entire nature of this job, the boat finally saw daylight in the finest form. That was to attend the highest honor one could bestow on a project like this, and it was to showcase the boat proudly next to the best of the best, and the world's largest gathering of Chris Craft Commanders, the summer of 2008, at Huron, Ohio. The following photos will show FEELGOOD proudly docked next to some of the finest Commanders anywhere, and giving away nothing.
The woodwork on this boat looks like the owner is in the business of wood working, lol, and of course this is very true. It is outstanding inside and out.
A week before the Huron Rendezvous, on the out-of-the-shop victory tour, one of the motors decided it had enough. The motor has to be hauled out and replaced. Not to allow a minor inconvenience like a bad motor dampen his fun, Chris motored to the event on one engine, much to the delight to the attending crowd who was able to see this gem in all it's glory, proudly displaying the gleaming teak we've seen so much about in photos. Only this time we were able to see it in person, and I can tell you these photos don't do it justice. This Commander has had thousands of hours worth of work spent on her, and thousands of dollars too, and it shows. It is well on the way to being one of the top Commanders in the fleet, anywhere.
I hope you enjoyed the show..........many thanks to Chris and his family for sharing such a large part of their lives here on THE FORUM. This should give everyone a good taste of what it is like to really do it right, and serve as an inspiration for those who will follow. I'm one who needs to follow, but looking at all the work that was done, I don't underestimate the nature (or cost) of the work necessary to even come close to FEELGOOD.
Regards,
Paul
|
| Mike S
(no login) | Re: Finally seeing daylight again ( at the world's biggest Commander Rendezvous ) | September 30 2008, 5:44 PM |
Wow! Now we know all the work that went into making Feelgood look good - actually beter than good; GREAT! She looks even better in person. I wish I had such wood working skills. Nice work Chris.
Mike Schrage
Hooz-A-Bum
1971 35' Sports Cruiser
|
| James Brunette
(no login) | Good luck Chris | October 6 2008, 4:39 AM |
Hello Chris,
Just thought I would send you a note since I feel as though I know you through all of your postings here on the forum. You've done a marvelous job with the boat, and it is sad to see a guy experience tough luck with a motor like you did this season. The good news is, those small block Chevy motors are plentiful and easy to rebuild, should you or a buyer decide to do the work. I am quite impressed with the standard of boating on Lake Erie, your boat being one of many expamples I have seen here.
Hope it works out for you which ever way it goes, take care, keep us informed as to how you and the boat are doing.
James
|
| | Current Topic - FEELGOOD, Chris Wade's 1965 Sport Fisherman ( A Photographic Review ) |
| |
|
|