I'm heading by the marina after work this eve, will pull the starboard carb and hopefully do a rebuild this evening. I ahve a couple of kits at the house. It will be good to get the big dogs back up to rpm and solve that rich fuel smell I experience while at idle at the docks.
I understand a certain guy on Lake Erie spent the WHOLE DAY messing around with CHANGING CHANNELS. Lucky dog!
It was beautiful here today. Hope it is over the week end.
Regards,
Paul
This message has been edited by FEfinaticP on Oct 17, 2008 4:33 PM
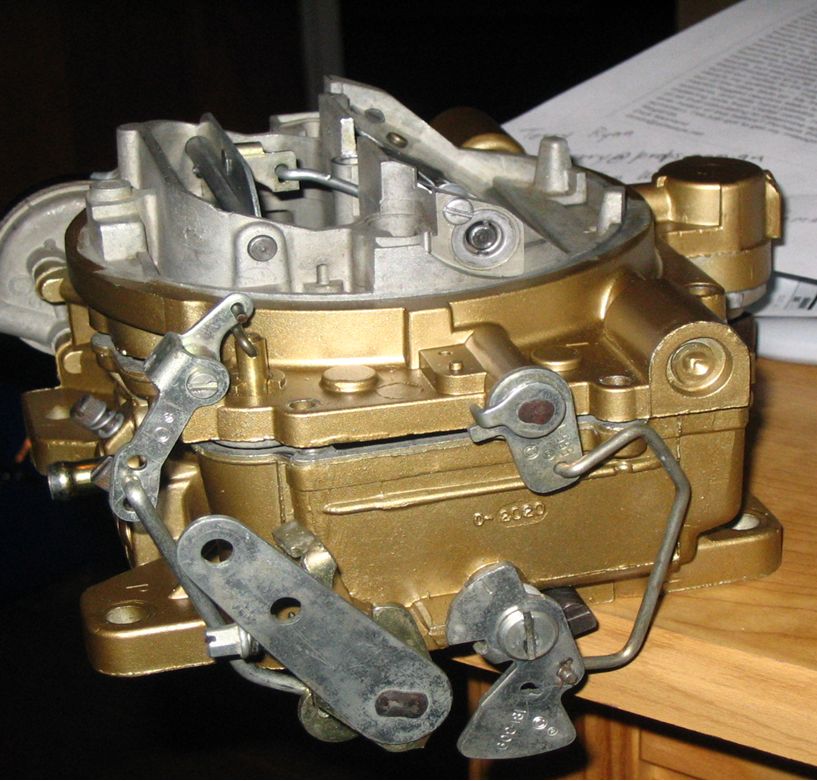
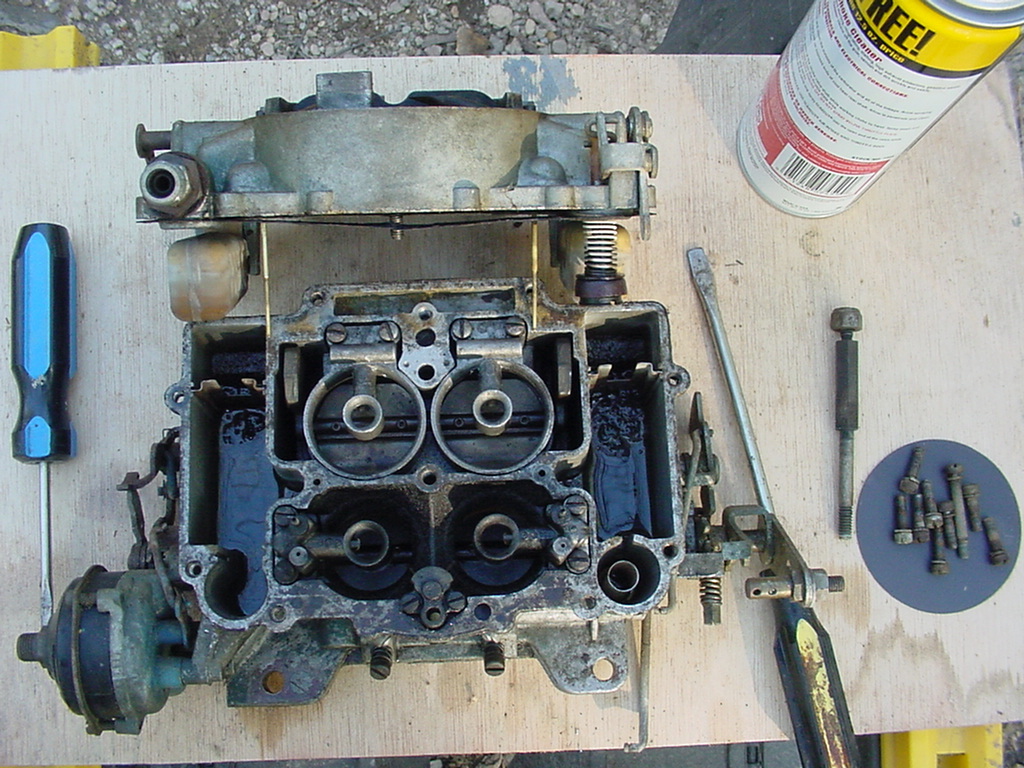
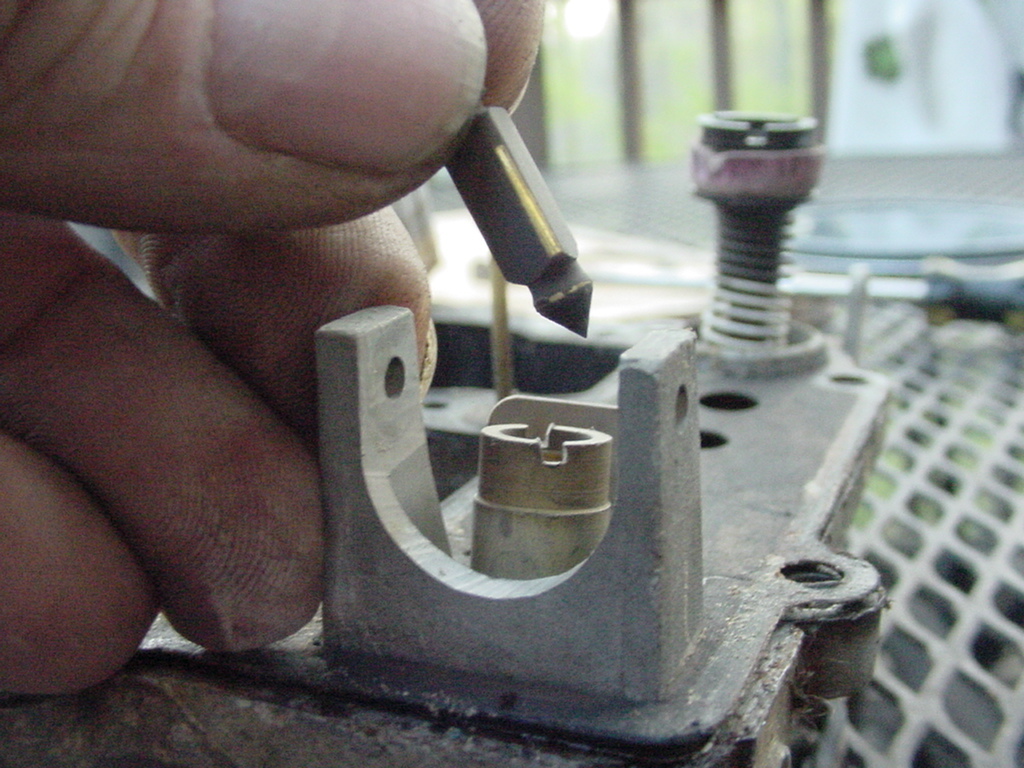
Well I decided to depart from my plan, not sure it was an entirely good idea, but time will tell. Rather than rebuilding the starboard carb that has been running on the boat, I took one off one of my spare 427 motors and rebuilt it instead. I dare say, the one that has been running on the boat would hopefully have been cleaner inside, but with all new jets and gaskets, etc., it should now work well. I didn't see anything that looked like it was out of spec, worn, or broken.
Here are a couple photos before I took it apart.
Things looked sooty, but rebuildable.
More photos next post.............................
This message has been edited by FEfinaticP on Oct 17, 2008 4:25 PM
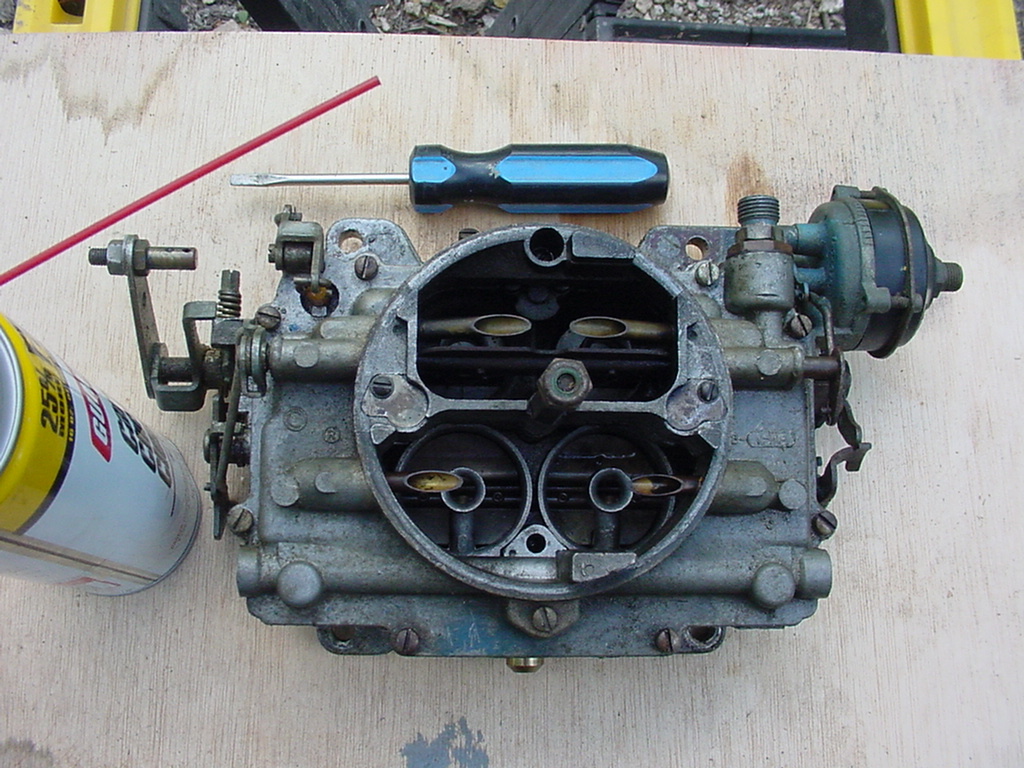
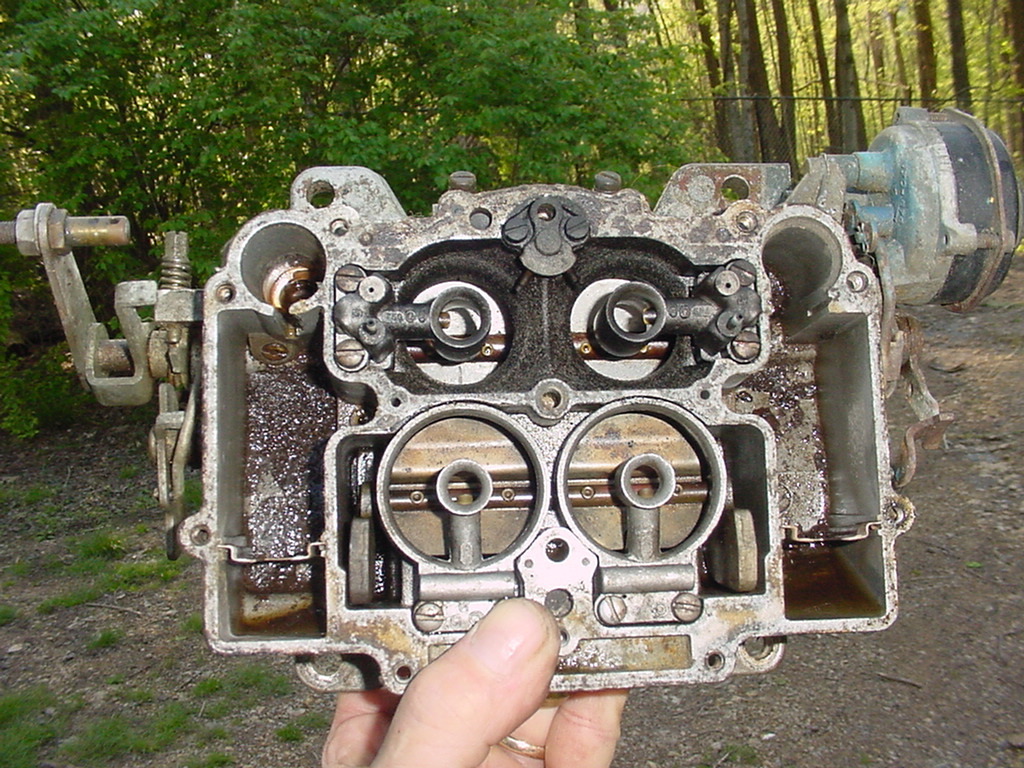
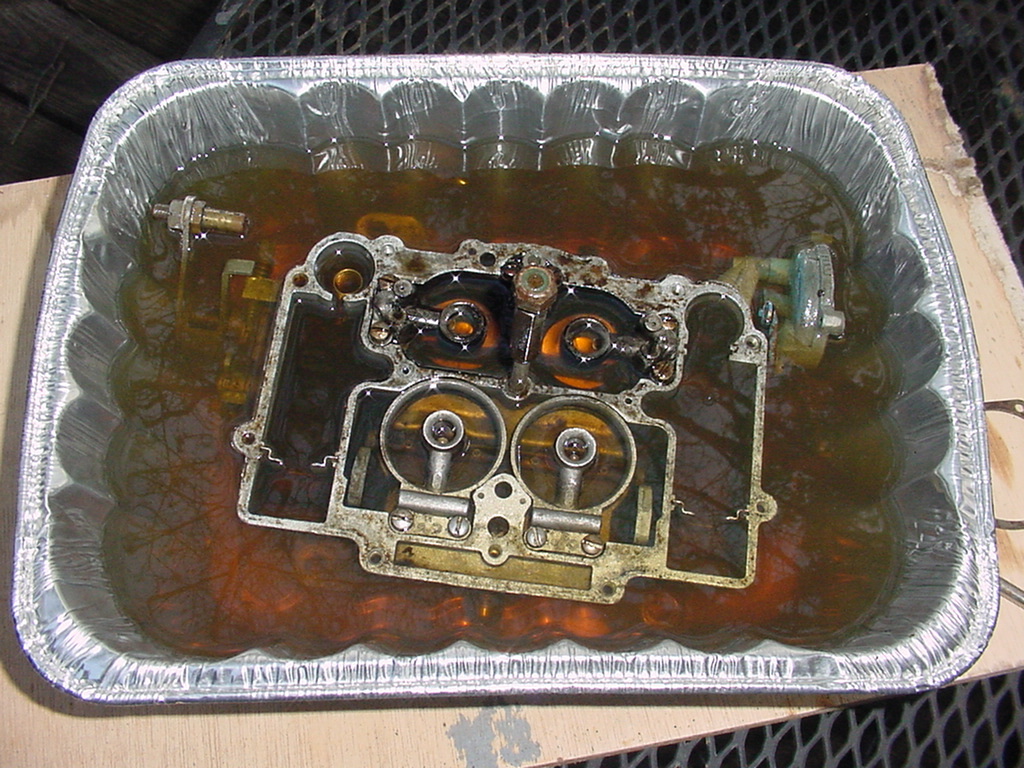
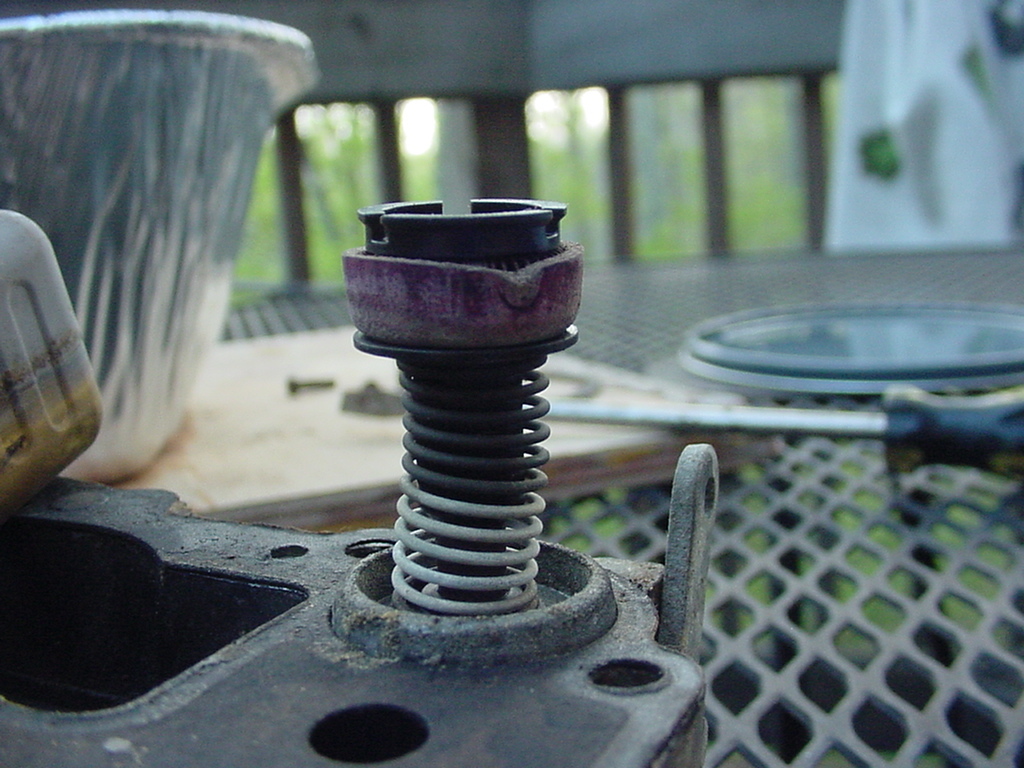
Once opened up, more dirt was found! This was going to be more than a one can of carb cleaner job!
Upon seeing the sediment I decided I better go for help. Off to the auto parts store for something to soak the carb in. After about an hour of soaking, carb cleaner was used with more success.
I am planning on popping the one on the boat off, and popping this one on. This should take me less than 30 minutes to do. I'll bring the one from the boat back and rebuild it for a spare.
These Carter AFBs are pretty darn simple. We'll see what kind of job I did when this one get a chance to show it's stuff.
Paul,
Looks like a 2 gallon carb cleaner job. Don't forget to change the check valve for the accelerator pump. It's at the base of the pump chamber on the bowl side.
Mine looked good but were bad. I changed them and the pumps work great now. Btw, my engines fired right up from a long winter's nap as well as some intrusive work. No leaks. I'll add some pics to the other post I started.
Geo.
My carb is back together and ready to run, however, I probably won't get a chance to do the install in between mowing and other tasks this week. May as well order a couple of these guys.
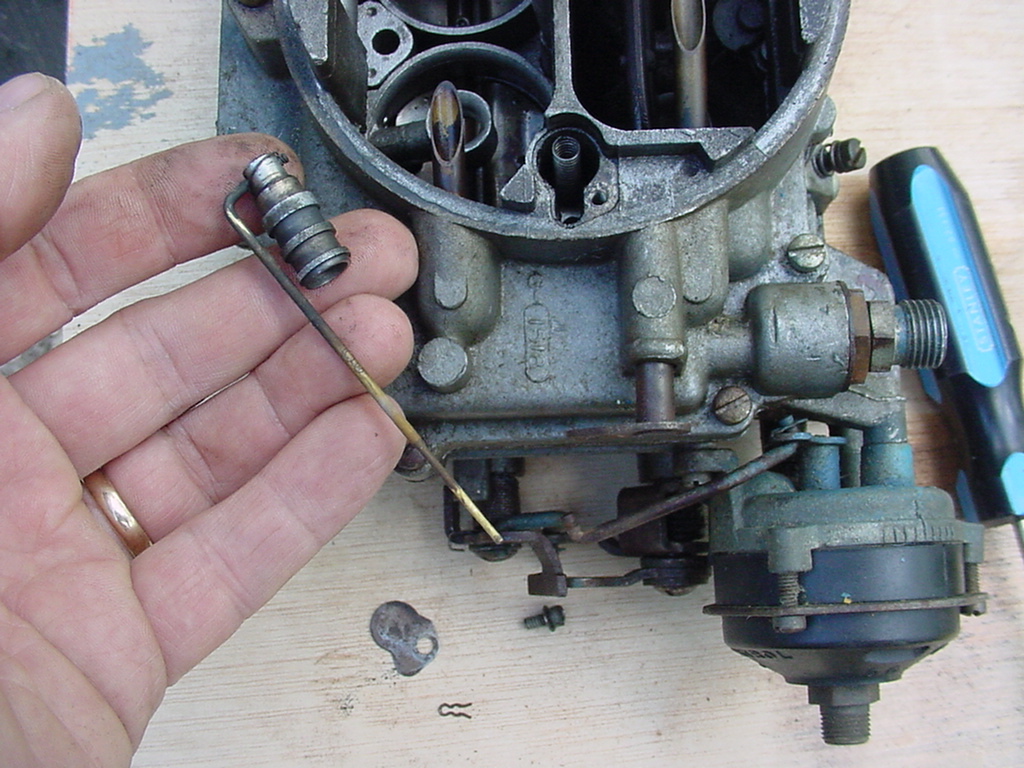
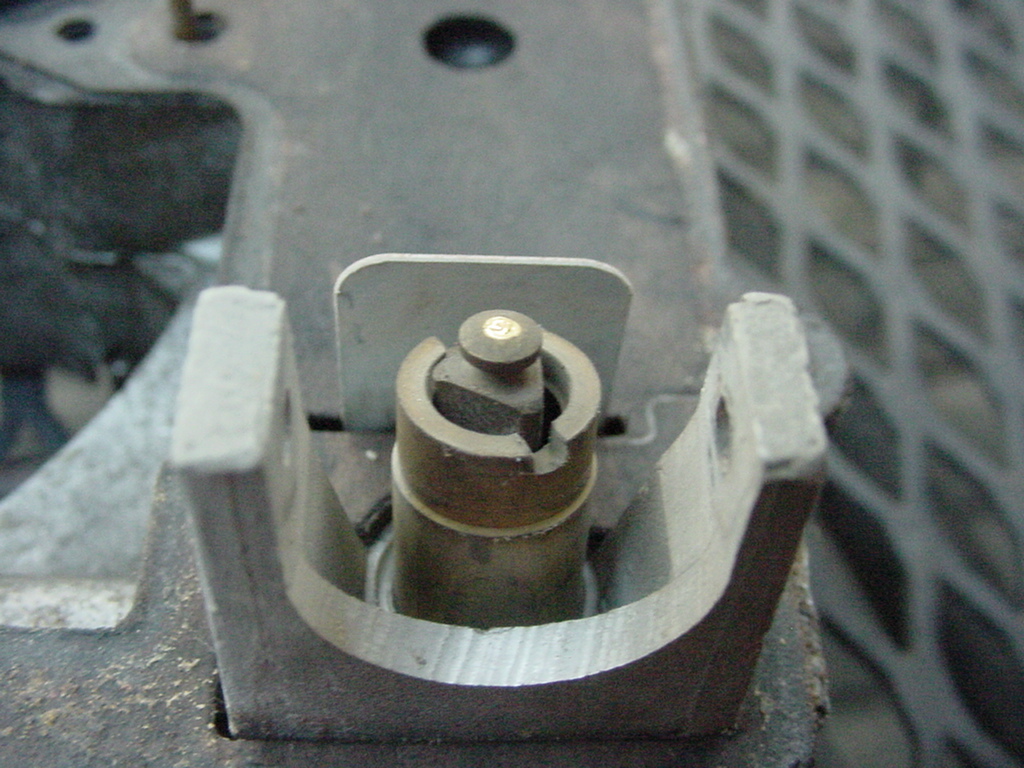
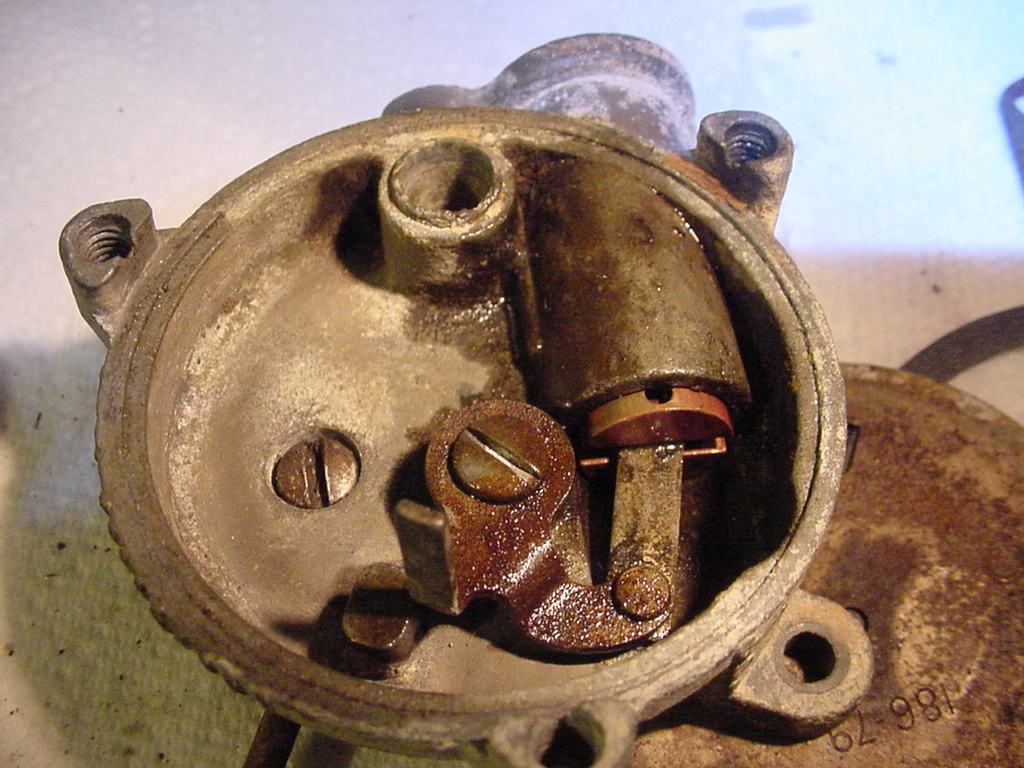
I decided to see what the heat activatd choke assembly looked like inside, and I�ll post the photo images tonight. It�s pretty cool how they got this device to work. There is a copper piston that rides in a bore, and it�s function is to stabilize the lever arm forced by the thermocouple. Odd thing about it, however, that piston doesn�t like dirt and it will seize up if a speck of dirt gets in. I had to work mine a bit while flushing with carb cleaner, but once it was clean inside that bore, it functioned like new. I put a couple drops of Teflon oil on it to keep it sliding.
The design is flawed because the bore is turned up so it gets any dirt that may drop in. Sadly, this is probably THE reason many of these old chokes stopped working. I suspect mine will work fine when it is installed, and I�m anxious to try it out.
With the check valve and chokes, starting the boat will become a new experience.
Here's what the piston assembly looks like, after being freed up with a little carb cleaner and a drop of teflon oil. A little more brushing with a brass gun brush, I'll give this another washdown and lube, and pop it together.
The function of this assy is to have the upward stem seen in the photo work with the heat activated metal coil in the choke housing. WHen that coil starts to tug away at the stem, the piston you see in this photo adds stability to the action and supposedly keeps things from binding, etc. In reality, that piston is facing upward so it can collect dust and pieces of rust. Since this is a very simple device, it may be wise to pop it open now and then and flush things out, drop a little sewing machine oil or teflon oil in there and keep things reliable.
Two options on the choke ( rebuilt OEM and electric conversion )
April 29 2008, 7:26 AM
You can refurbish the old system with a new spring and it should work like new for another 40 years.
The old style spring loaded thermo choke is a dumb device that works without any electricity, and in that regard it's pretty reliable. As long as the slide and spring are clear to move, they work well over the long term.
I like the electric chokes, but don't necessarily like the fact that you need an electric current to make them work. It goes without saying, that if you have electric power to start the motor, then you'll have enough juice to activate the choke. When they fail, they fail in the open position and I like that.
With plusses and minuses that can be said for each system, the electric conversion remains an option.
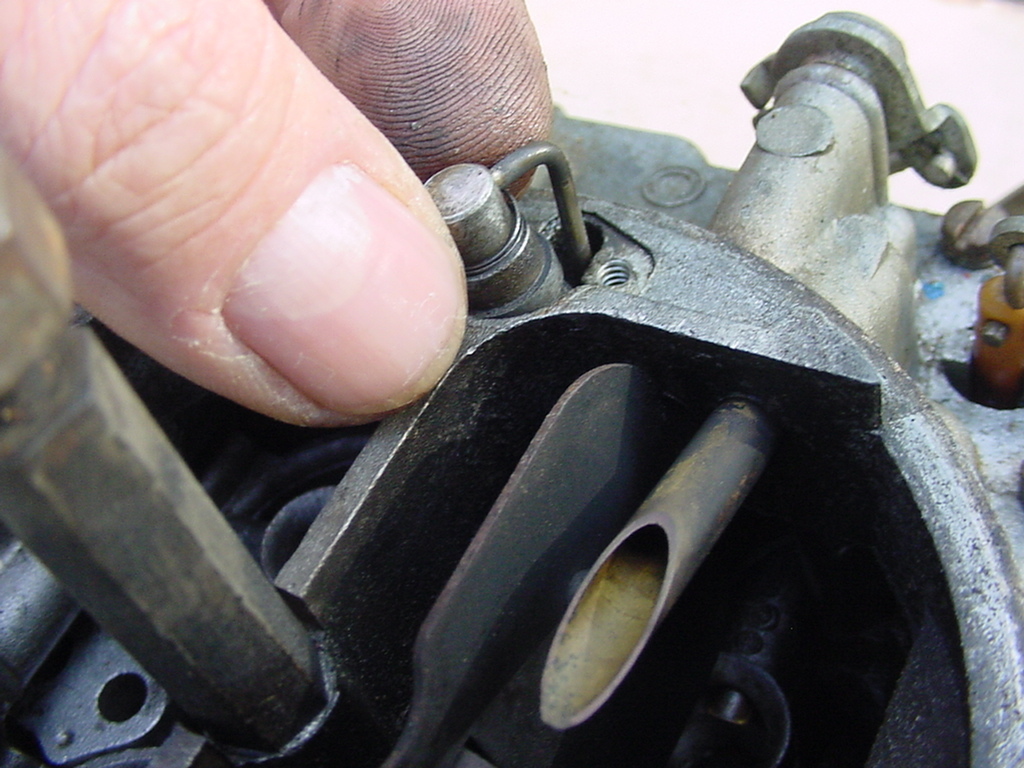
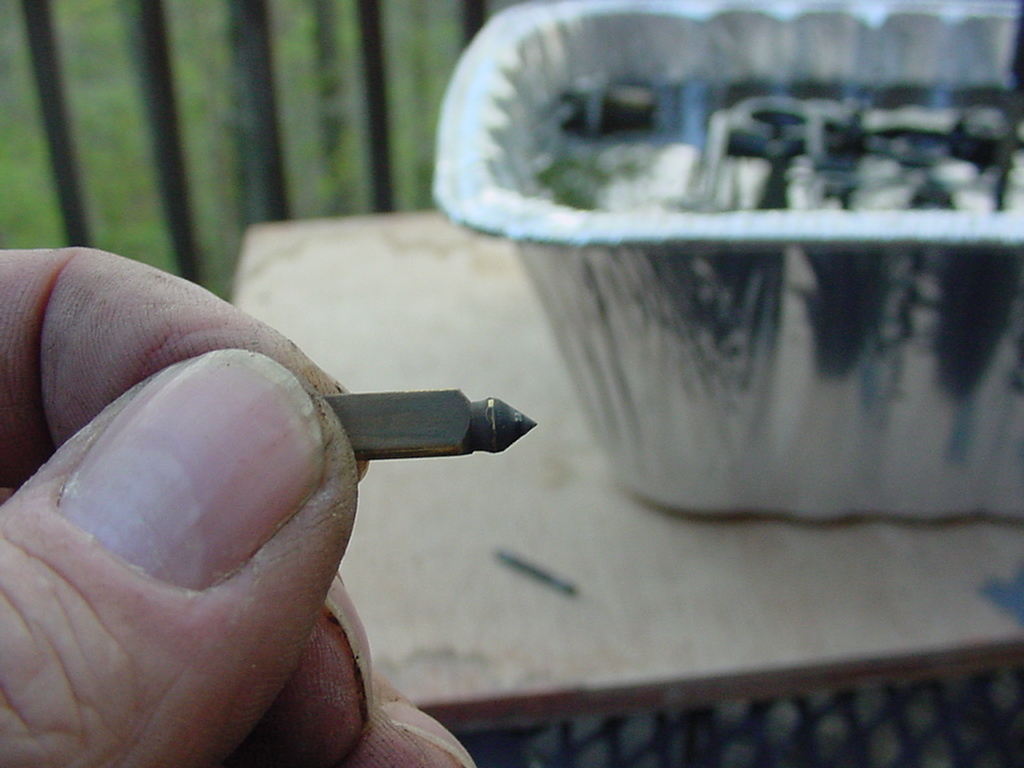
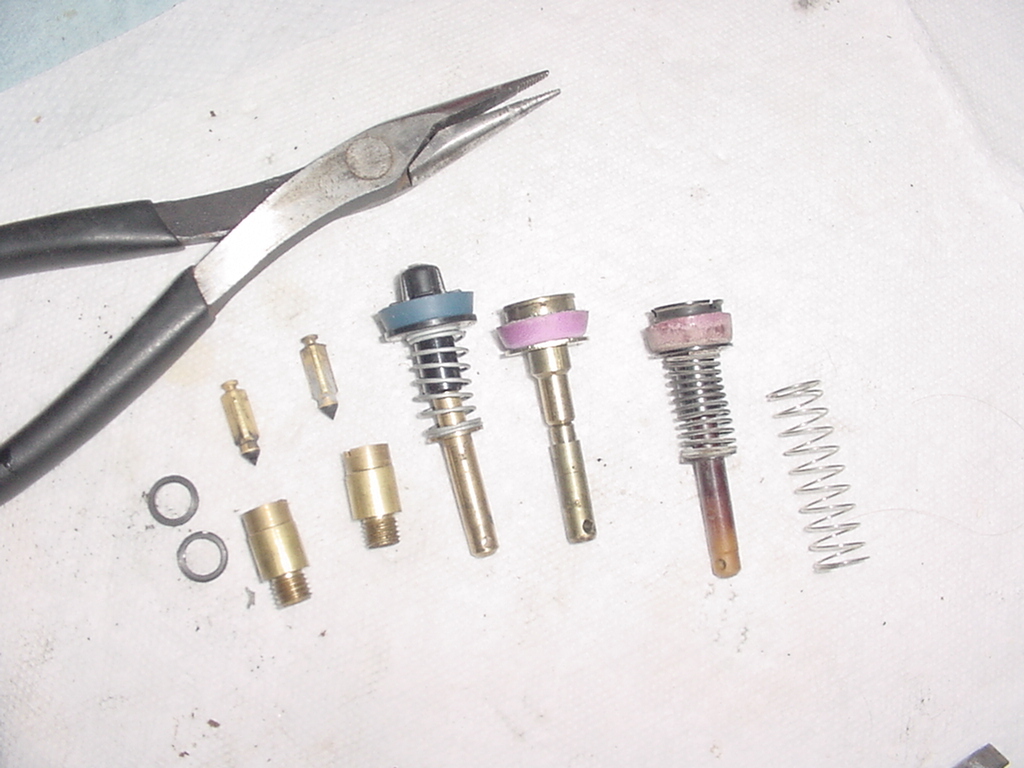
The accelerator pump and plunger assy that came out of the carb looked like this.
The one that went back in didn't have the spring around the central stem, it relied on a spring underneath. I've seen them looking both ways, wonder why the difference?
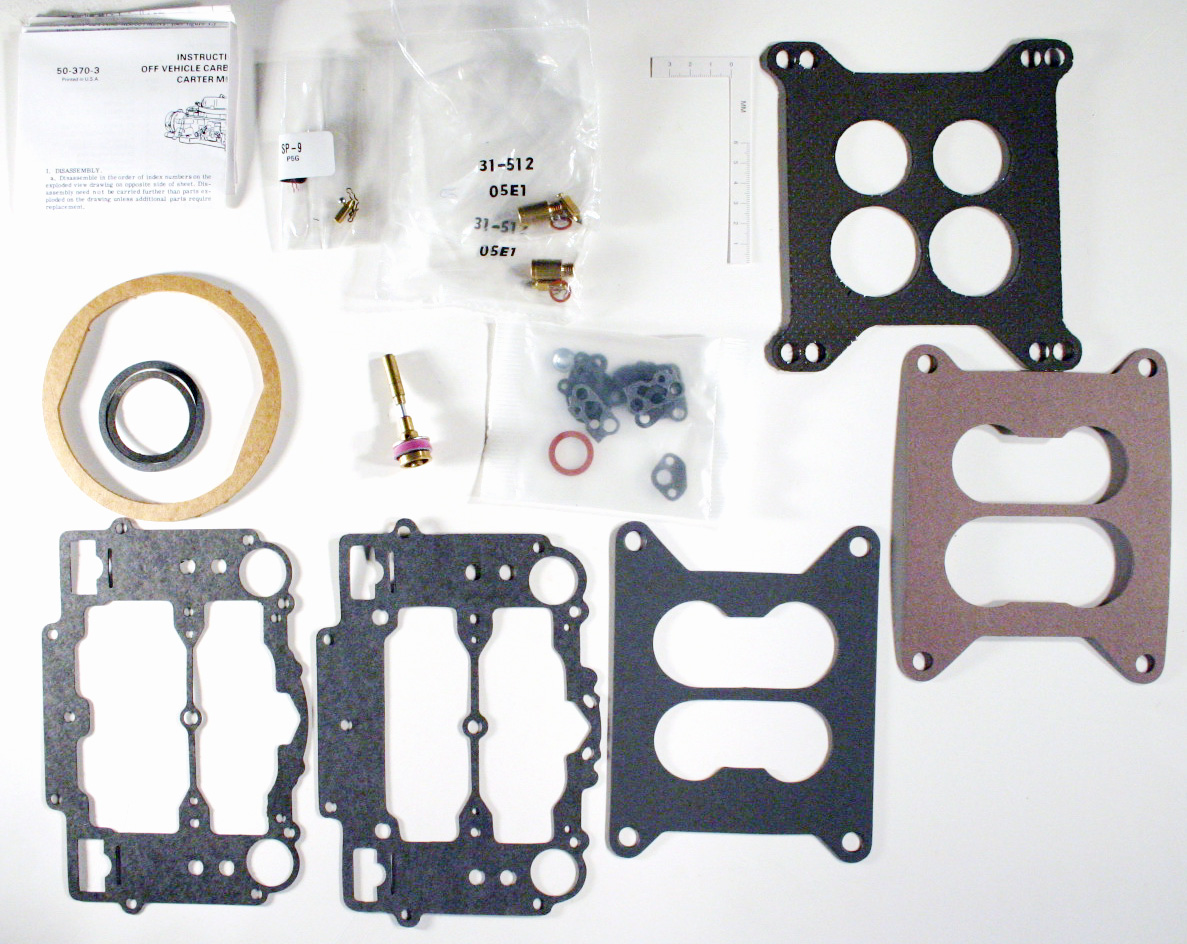
In this photo of a Carter AFB rebuild kit, you can see the style of accelerator pump I used. Everything fit nicely, hope it works well.
Paul
This message has been edited by FEfinaticP on Apr 21, 2008 9:21 AM
Paul,before you put your carbs on the engine,check the throttle butterfly`s for a "perfect wide open"position.Turn the carb upside down and then rotate the linkage to WOT and check the throttle vavles.They all should be at a 90 degree intersect with the carb base .
I have yet to see a perfect wide open setting on an OEM Chris Craft carb.
Tim
From my various kits and parts that have come out of carbs, here are three different types of accelerator pumps that are used in the Carter AFB. The one in the center has a two piece rod, which slides up and down. All have the identical fittings and are sized for installation. Time will tell...............
Tom, they all fit, and I use the one next to the old one, that looked closest to the one that came out of the boat. Guess what? It works pretty darn well.
I'll bet you can buy three different kits and find at least two different accelerator pumps.
Thought this would make a nice addition to our archives.
Tom
W Series (WCFB) � (4 barrel) (1952 � 1965) metal tag; also code number stamped under base
AFB Series � (4 barrel) (1957 � 2001) metal tag: also some units stamped on edge of flange, some units stamped center of bowl in rear, some units stamped along bowl � airhorn seam in front, some units NOT stamped (tag only)
BBS Series - (identified by tag only, once the tag is removed, identification is extremely difficult
BBD Series - identified by tag only, once the tag is removed, identification is extremely difficult
YF Series (YF, YFA) - most O.E. carbs stamped with the number followed by letter �S� on center section (bowl)
UT Series � identified by tag only, once the tag is removed, identification is extremely difficult
N Series (N, ND, NRD) � some stamped on edge of flange, others tagged
Carter numbering systems. Three different types of numbering systems are found on Carter produced carburetors.
(1) On carburetors built for Chrysler Corporation, a series of 3, 4, or 5 letters and numbers; i.e. EV1 or D6H2.
(2) On carburetors built for Ford Motor Company, the �Ford� numbering system which is �lnll � l(l)(l)� or letter, number, letter, letter dash letter (possible letter) (possible letter) i.e C5VF-A. This system is codified in that the first letter is the decade (B=1950�s, C=1960�s, etc.); the number is the last digit in the year; the 3rd and 4th letters (before the dash) represent the vehicle model (VF=Lincoln); and the letter or letters after the dash are a modifier which distinguishes the exact application. Thus in the example C5VF-A, the carburetor would have been the first application for Lincoln in the year 1965.
(3) The traditional Carter numbering system which consisted of 1, 2, 3, or 4 digits; followed by the letter �S�, possibly followed by another letter. It is extremely doubtful that any of the single, double, or early triple digit tags will appear; as they were produced before 1930 and were constructed of red cardboard. The metal tag appeared about 1930 with tag numbers of about 300s. The 4 digit tag appeared in 1952, and was continued on until the end. The letter S and following letters, when present, have caused much speculation (mostly incorrect). In Carter�s terminology, an individual part such as an idle mixture screw was a single part; whereas two or more individual parts sold together such as a needle, seat, and gasket were sold as an �assembly�. Carter used the suffix letter S to denote assembly. Since all carburetors are composed of multiple parts, the letter S was appended to all carburetors using the traditional numbering system i.e. 938s. If a significant engineering change was made to the carburetor, the letter �A� would be appended to the S (i.e. 938sa). A second change would have the letter A replaced by the letter B (i.,e. 938sb). The highest engineering change of which I am aware is 4 i.e.938sd. Contrary to popular belief, the S DID NOT mean standard transmission, nor the SA automatic transmission.
The Carter AFB (Aluminum Four Barrel) was the second four barrel carburetor produced by Carter, after the WCFB. AFB's were appeared in 1957 and were used as original equipment on most makes of car at one time or another up to 1971. The last notable OEM application was as a dual-quad setup on 1971 Dodge 426 Hemi engines.
Interestingly, some Ford AFB's weren't made of aluminum at all, and were in fact cast out of zinc.
Carter AFB's were produced as the Carter Performance Series carbs until 1998. They are currently available as Edelbrock AFB carbs, which are produced by Weber USA. Most parts, including tuning parts like the jets and metering rods are interchangeable between the original Carter AFB's and the currently produced Edelbrock carbs.
Carter AVS - Dodge
The Carter AVS (Air Valve Secondary) is a refinement of the basic AFB design. Whereas the AFB used a velocity valve, which is a counterweighted flap below the secondary venturi, the AVS used an air valve, which is a spring loaded flap above the venturi. The purpose of the two is similar, but the air valve is adjustable from outside the carb.
When the throttle is opened so that the secondary throttle plates begin to open, vacuum develops under the air valve, slowly pulling it open. In this way, the air flow is controlled and the mixture is kept from getting too lean if the throttle is opened suddenly.
Carter AVS carbs appeared in 1966 on the 275 HP version of the Chevrolet 327, but were never again used on Chevies after that. AVS carbs were found mostly on Mopar applications from 1968-1971. The most sought-after AVS carbs are the 800 cfm models found on 440 CID motors.
Recently, Edelbrock has been marketing the Thunder Series AVS carburetor, again reproduced by Weber USA.
Carter did not build a performance version of the AVS after OEM production in the 1971 model year.
---------------------------------------------
To determine Carter AFB carb flow, measure the butterfly bores and use the table below:
Base part number is 9000 and the last three digits refer to flow rating. For example, 9625 is a 625 CFM AFB carb. Adding 0, 9625 means it was set up for a Chevy style linkage, adding 1, 9626, means it is a 625 for a Chrysler, adding 2, 9627, means it is for Ford; adding 10, 9635, means provision for EGR.
If the carb is an aftermarket version, it will have a 9xxx cast in the front near where the mounting stud goes through.
This afternoon around 6:00 PM (after a day on the Fergusoj 135) I walked aboard TRADITION with the rebuilt carb in a box, 30 minutes later the starboard engine was running better than it has for quite awhile.
I removed the old carb, checked it out, put it in the box. It actually looked better on the outside than the one I bolted back on. I tightened everything up and set the choke to where I thought it would work, cranked a bit to pump fuel into the bowls, and then
the deep baritone bellow of a big NASCAR racing block from the 1960's lit up and ran like a sewing machine.
VaaaaaaaaaaaROOOOOOOOOOMMMMMMMMMMMMMMMMMMMMM
burble, burble, burble, burble, burble...................what a difference a carb makes.
No more unburned gas smell now, she's running great. When a marine 427 is tuned properly, there's nothing that sounds any sweeter.
If you unhook the PCV connection it leans out the carb and the motor runs faster, and it won't idle down. Therefore, be sure you have the PCV valve hooked up properly, I've seen these installed sideways when they should be vertical.
I'm amazed at what a difference a carb makes.
Now I'm real interested in getting TRADITION back up to rpm on the water. The old carb on the starboard motor was draqgging the port motor down, and I couldn't reach max rpm any more. Yes, I knew I needed a rebuild but ran the boat a few times anyway, as she cruised reasonably well just up on a plane.
Carbs fail slowly most of the time. Things internally deteriorate slowly, grime builds up over the years, and sometimes things dont change fast enough for people to be consicious of what is happening. Eventually it gets bad enough that something needs to be done. The good news is, those little carter carbs are easy to rebuild. The hard part is getting all the dirt off. Swapping out the old pieces for the new ones is a piece of cake.
Ever see soot blowing out the tailpipe when you start up?
October 17 2008, 4:30 PM
If so, it's the PERFECT signal your carb is running rich.
Also, if you have to prime and prime and crank to start your motors, you will undoubtedly see some raw fuel film on the surface of the water when you do start.
My starboard motor had been running rich for some time. I could see dripping fuel at idle, but it ran reasonably well at speed. When the motor was started I frequently saw soot being blown out the tailpipe. Now with the rebuild, that has totally gone away.
With all the carb info posted recently, I thought I'd add this post back to the front page. I know the carb I chose to rebuild (in these photos) doesn't look much better than the one I set aside, but internally it was functional and it subsequently passed the "run" test.